Replacing a Korg M3 Touch Screen
 |
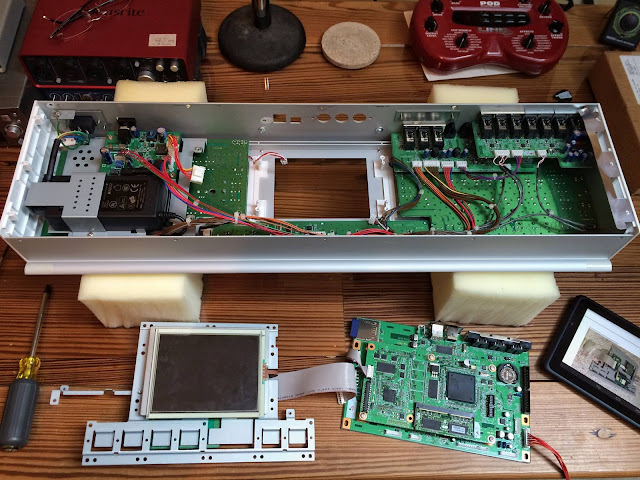
| Disassembled Korg M3 with the original touch screen removed. Note my tablet with the touch panel replacement instructions in the lower-right. |
As many long-time Korg M3 users will tell you, there is a well-known problem with the synth's touch screen. After several years, the screen will start developing dead areas where touches no longer register. Typically this is in the top portion of the screen. I've read some explanations for it, but it doesn't really matter. The bottom line is that it's a progressive problem that will eventually make the touch screen, and therefore the synth itself, unusable. And the only permanent fix is to replace the touch panel.
About a year ago, my M3 started developing the problem so I did a lot of research into it. I found out how to slow down the problem (keep it in a climate controlled environment and store it so that the touch screen is laying down flat). That actually temporarily corrected the problem and slowed down its progress. But eventually the dead areas become permanent. Fortunately, enterprising souls on the Internet have documented how to fix that as well. The "touch screen" on the M3 is actually made up of two panels - the display panel which is actually the visual screen that you look at and a clear glass touch panel over it that senses where you touch. The permanent fix is to replace the touch panel. I bought the replacement part from Mouser ($22) about a year ago, but the problem finally got bad enough to install it recently.
The touch panel replacement instructions are posted on Karma Lab's web site. Replacing the panel is not terribly difficult, but there are a lot of electronic parts you have to remove to get to it so it takes some time. I've developed 3 rules for these types of projects:
- Take your time. Don't even start it if you're in a hurry or if you're time-constrained. Working too fast is usually the source of mistakes. Set aside more time than you think you need, work slowly, and work deliberately.
- Understand the instructions. Read the entire instructions ahead of time so you're familiar with the procedure, all the tools you need, and the ordering of tasks. Then as you're doing it, make sure you fully understand each step before you actually perform it.
- Use the right tools and don't force anything. More stuff gets broken because people either try to use an improper (or worn out) tool, or they try to brute force something and end up damaging it.
You will remove a lot of screws when disassembling the M3. I strongly recommend having a couple of cups to keep them in so that you don't lose any. Fortunately, there are only 2 sizes of screws used in the entire thing so it's unlikely you'll get them mixed up.
One somewhat nerve-racking part is removing the old touch panel from the display panel. The two panels are attached to each other using double-stick foam tape around the perimeter of the display. To remove the touch panel, you have to slip a utility or X-Acto knife between the touch and display panels and cut the foam tape around the entire perimeter. I was nervous about damaging the display panel with the knife. But I used a brand new (i.e. sharp) blade and worked slowly and carefully and didn't have any problems. Once again, just work slowly.
 |
| Complete and operational with the new touch panel |
Thanks for writing this up; just resuscitated our M3 using your instructions. The worst of it was the variety and tightness of the connectors on the motherboard.
ReplyDelete